
In this final part of my series of Phaser Form UI, we will look at adding drop downs to the form. I originally came up with this for adding a form to report abuse in a virtual world. It can also be useful for choosing a range of options when starting a game, especially if there are too many to display with buttons or other graphics.
This project builds on the code written in the other 2 blog post of this series. Adding input text and adding HTML buttons.
Adding the drop down to the html
First let’s add a drop down to the index.html. Place this at the end of the HTML just above the </body> tag
<select class="form-control" id="optList" name="selectbasic">

    </select>
We can place and scale the optList drop down using the functions we built before. Place these at the end of the create function in SceneMain
this.formUtil.scaleToGameW("optList", .8);
this.formUtil.placeElementAt(27, "optList");
Adding new functions to formUtil
Our FormUtil will need some new functions to deal with drop downs. The first being to add an option. We will pass in the id of the drop down, the text to display and an object that can contain data for the item. The code will get the drop down
 addOption(dropDown, text, item) {
        var select =  document.getElementById(dropDown);
        var option = document.createElement('option');
        option.text = text;
        option.data = item;
        select.add(option, 0);
    }
From Phaser we can add options to the drop down like this
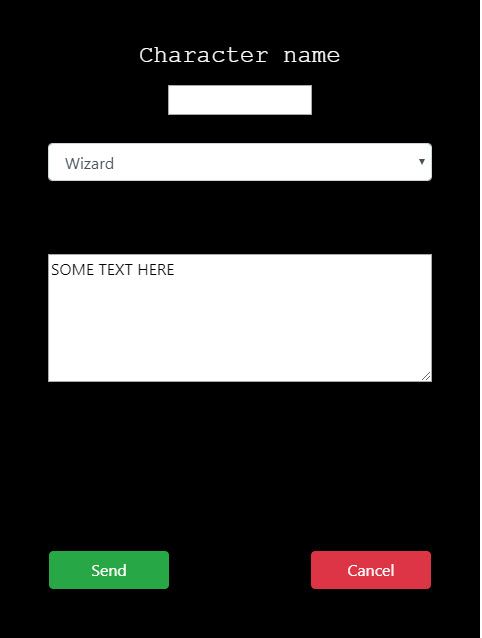
this.formUtil.addOption("optList", "Wizard", {
            id: 1,
            magic: 10,
            str: 5
        });
        this.formUtil.addOption("optList", "Elf", {
            id: 2,
            magic: 6,
            str: 6
        });
        this.formUtil.addOption("optList", "Warrior", {
            id: 3,
            magic: 1,
            str: 10
        });
Listen for Events
We can use the functions already written to add a change callback
this.formUtil.addChangeCallback("optList", this.optListChanged, this);Then we need to be able to get information that is selected. There are 3 different functions we can create for this.
Get the selected data
 getSelectedItem(dropDown) {
        var e = document.getElementById(dropDown);
        return e.options[e.selectedIndex].data;
    }
Get the selected index, such as 0,1,2,3
getSelectedIndex(dropDown) {
        var el = document.getElementById(dropDown);
        return el.selectedIndex;
    }
Get the text displayed in the dropdown
  getSelectedText(dropDown) {
        var e = document.getElementById(dropDown);
        return e.options[e.selectedIndex].text;
    }
Callback function
Then all that’s left is to create the function that we referenced earlier.
optListChanged() {
        console.log("optListChanged");
        var obj=this.formUtil.getSelectedItem('optList');
        console.log(obj);

    }
Adding Labels
Since the
var label=this.add.text(0,0,"Character name",{fontSize:game.config.width/20,color:'#ffffff'});
 label.setOrigin(0.5,0.5);
 this.formUtil.alignGrid.placeAt(5,0.5,label);
Here is the final result
I hope this has been helpful to you. You can download the complete code below.
This does not scale correctly if phaser game scales, right?
Do you mean if you change the size of the game while playing?
If so, then no. You can use it in your resize handler though.
Mobile games don’t usually resize. On Desktops I usually put the game into a pop-up.