
Deprecated: Automatic conversion of false to array is deprecated in /home/wcc1969/public_html/phasergames.com/wp-content/plugins/publitio-offloading/includes/class-publitio-offloading.php on line 577
Phaser 3 Physics
With the release of Phaser 3 physics now have a lot to offer. Whether you are a beginner at Phaser or an old hand at earlier versions and want to move into Phaser 3, learning the basics of at least one Physics engine will make your games much easier to build. One of the best things about Phaser is the way it implements physics. Before physics engines, programmers had to use a lot of complicated trigonometry formulas. I still love those formulas, but they can be quite time-consuming to look up and write for each and every game.
Config Objects
One of the changes to Phaser 3 is the use of config objects vs. parameters in the constructor. It is a style I will probably adopt in my future code. With parameters, we would write code like this:
var myHero=new Hero("Bob","fly",10);

class Hero
{
	constructor(name,superPower,speed)
	{

	}
}
The problem with that is sometimes I was adding parameters later in the game or app sometimes up to 10 parameters. Often times it made more sense to group some of those parameters together, and I had to go and change a lot of code that was already being called.
With a configuration object works like this:
var myHero=new Hero("name":"Bob","superPower":"fly","speed":10);

class Hero
{
	constructor(params)
	{
		this.name=params.name;
		this.superPower=params.superPower;
		this.speed=params.speed;
	}
}
The advantage is that we can just add a new property to the params object, as many as we like without having to go back and change the code.
Game config objects
Here is a basic config object for setting up a Phaser 3 game. Then that object is passed into the new Phaser Game Object
var config = {
    type: Phaser.AUTO,
    width: 480,
    height: 640,
    parent: 'phaser-game',
    scene: [SceneMain]
};

var game = new Phaser.Game(config);
Physics config objects
Phaser 3 uses a physics config object to set up your game to use an engine. In this example, we are going the use arcade physics. We set the default property to “arcade” and then make an object inside the config object called arcade and give it a property of “debug” set to true. I’ll explain later what the debug does.
var physicsConfig = {
    default: 'arcade',
    arcade: {
        debug: true
    }
}
Now use put that physicsConfig object in a property called physics inside the game config object
var config = {
    type: Phaser.AUTO,
    width: 480,
    height: 640,
    parent: 'phaser-game',
    physics: physicsConfig,
    scene: [SceneMain]
};
Setting up the Bullets
First, we need an image to be our bullet and preload it.
preload() {
        this.load.image("bullet", "images/bullet.png");
    }
Next, we need a group to hold the bullets. Instead of a normal group, we will be using a physics group. The code below adds a physics group with the defaultKey being the key we used in the preload function above. The maxSize creates 10 bullets ready to be used.
this.bullets = this.physics.add.group({
            defaultKey: 'bullet',
            maxSize: 10
        });
Shooting the bullets
Now the bullets are sitting in the group, but we need to activate them and give them velocity to be effective. Let’s just activate a bullet if the canvas is clicked anywhere. We can also set the position of the bullet in the place that is clicked. First set up a click listener to the scene.
this.input.on('pointerdown', this.shoot, this);
Then we set up the shot function with a pointer being the sole parameter. The pointer is the mouse on the computer, and well.. whatever the equivalent object is on the phone. In any case, it has information about where on the canvas was clicked in the form of an x and a y property.
shoot(pointer) {
        var bullet = this.bullets.get(pointer.x, pointer.y);
        if (bullet) {
            bullet.setActive(true);
            bullet.setVisible(true);
            bullet.body.velocity.y = -200;
        }
    }
The first step in the code above is to get an instance of the first available bullet in the group. We do this with the this.bullets.get() and pass in the x and the y position. If we have run out of bullets, meaning more than 10 bullets have been fired then a null is returned. We have no bullet ready! So before running any code on the bullet object we first check to see if it exists. If it does, we set the active property and visible property to true.
The Body
The body is where all the information relating to a sprite’s physics is stored. Inside the body is a lot of cool things like gravity and velocity. Velocity is what is going to be used in this example. The velocity object has an X and a Y property and by setting this we can make the bullet go in any direction with many variations by setting the x and y to different speeds. In this case, we just want the bullet to go up, so we set the bullet.body.velocity.y to -200.
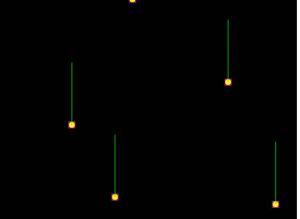
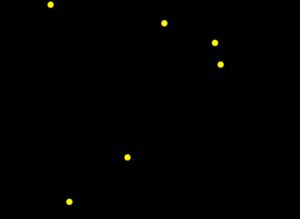
Debugging
Right now you will notice a border around your bullet and a green line out of the top. The square border is the hit area where any collisions will take place. The green line is showing velocity. This makes it easier to debug when the bullet seems to miss a spaceship or monster. You can turn this off by setting arcade.debug to false.
var physicsConfig = {
    default: 'arcade',
    arcade: {
        debug: false
    }
}
Resuing The Bullets
Right now, if you run the code as is, you’ll be able to fire 10 bullets and then no more. We need to be able to reuse the bullets and make them available to the bullets.get() function. To do that we need to check if the bullet is out of range. Out of range for this example means if the bullet goes off the top of the screen. We just need to check each bullets Y position and if it is less than zero we simply set the active property to false. We can do this in the update function.
update() {
        this.bullets.children.each(function(b) {
            if (b.active) {
                if (b.y < 0) {
                    b.setActive(false);
                }
            }
        }.bind(this));
    }
This is just the basics of Phaser 3 Physics. There is so much more to cover, like collisions and bouncing, but hopefully, this gives you a nice starting place, and I hope you found this article helpful.