
Phaser 3 Input Text
About a month ago I needed to find a way to implement a Phaser 3 input text field. This was due to needing to put a form into a Phaser 3 virtual world project I was working on. I had already placed an input element below the canvas for users to send chats to each other, but this needed much more space.
Could I accomplish my project’s goals without having to totally rewrite a text field, dropdowns, and other form elements?
Then I remembered in Phaser 2 we did have an input field that was a plug-in. I recalled that the developer added an actual HTML form element over the existing HTML5 canvas. Could I use some of the experiments I’ve been doing with the AlignGrid for form elements as well? So far I had only been using it to align sprites, text, and images inside the canvas.
I realized I could do it but with a limitation. That limit being that the canvas had to be in the top left-hand corner of the webpage. If I did need it to be in the middle of a webpage I could accomplish the task using an iframe. This did not pose too much trouble with my work because my games are either on mobile which means they’re in the top left-hand corner already or I use a pop-up window if the player is trying to use the game on a desktop or laptop. This post will focus on the Phaser 3 text input and I will follow up with additional posts covering buttons and dropdowns.
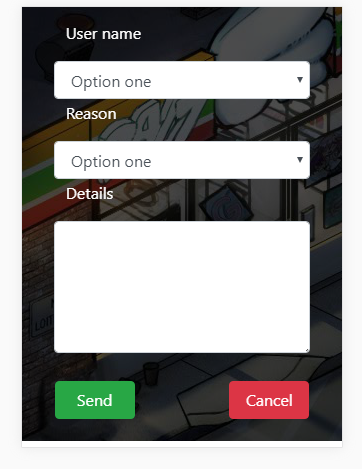
Here is the final result below:
The Phaser Code
Instead of adding a text field dynamically I decided to work with existing form elements placed into the index.html. I would then write a class that would allow me to keep writing in the Phaser code style I was accustomed to. It was important that I did all the scaling and aligning from a Phaser Scene. You can see what I mean in a sample of my sceneMain.
class SceneMain extends Phaser.Scene {
constructor() {
super('SceneMain');
}
preload() {}
create() {
this.formUtil = new FormUtil({
scene: this,
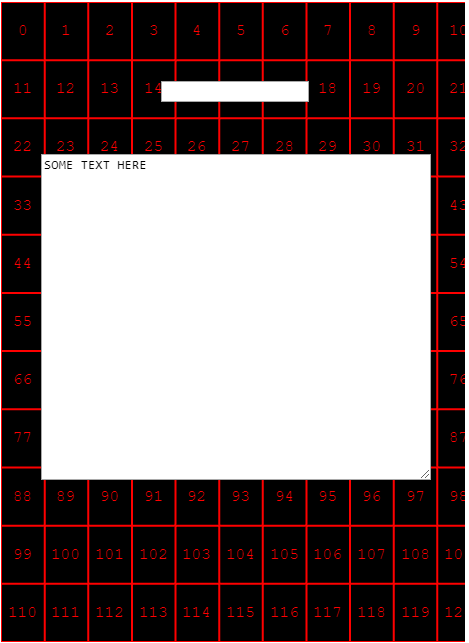
rows: 11,
cols: 11
});
this.formUtil.showNumbers();
//
//
//
this.formUtil.scaleToGameW("myText", .3);
this.formUtil.placeElementAt(16, 'myText', true);
//
//
//
this.formUtil.scaleToGameW("area51", .8);
this.formUtil.scaleToGameH("area51", .5);
this.formUtil.placeElementAt(60, "area51", true, true);
this.formUtil.addChangeCallback("area51", this.textAreaChanged, this);
//
//
//
}
textAreaChanged() {
var text = this.formUtil.getTextAreaValue("area51");
console.log(text);
}
update() {}
}The Html Code
For the HTML I used simple form elements after the game div tag with the id tags set to ‘myText’ for the text field and ‘area51’ for the text area.
<!DOCTYPE html>
<html>
    <head>
        <title>
        </title>
        <meta content="user-scalable=0, initial-scale=1,minimum-scale=1, maximum-scale=1, width=device-width, minimal-ui=1" name="viewport">
        </meta>
    </head>
</html>
<script src="js/phaser.min.js" type="text/javascript">
</script>
<script src="js/sceneMain.js" type="text/javascript">
</script>
<script src="js/main.js" type="text/javascript">
</script>
<script src="js/util/formUtil.js" type="text/javascript">
</script>
<script src="js/util/alignGrid.js" type="text/javascript">
</script>
<body>
    <div id="phaser-game">
    </div>

    <input type="text" id="myText"/>
    <textarea id="area51">SOME TEXT HERE</textarea>
</body>
The FormUtil Class
For the
class FormUtil {
    constructor(config) {
        //super();
        this.scene = config.scene;
        //get the game height and width
        this.gameWidth = this.scene.game.config.width;
        this.gameHeight = this.scene.game.config.height;
        this.alignGrid = new AlignGrid({
            scene: this.scene,
            rows: config.rows,
            cols: config.cols
        });
    }
    showNumbers() {
        this.alignGrid.showNumbers();
    }
    scaleToGameW(elName, per) {
        var el = document.getElementById(elName);
        var w = this.gameWidth * per;
        el.style.width = w + "px";
    }
    scaleToGameH(elName, per) {
        var el = document.getElementById(elName);
        var h = this.gameHeight * per;
        el.style.height = h + "px";
    }
    placeElementAt(index, elName, centerX = true, centerY = false) {
        //get the position from the grid
        var pos = this.alignGrid.getPosByIndex(index);
        //extract to local vars
        var x = pos.x;
        var y = pos.y;
        //get the element
        var el = document.getElementById(elName);
        //set the position to absolute
        el.style.position = "absolute";
        //get the width of the element
        var w = el.style.width;
        //convert to a number
        w = this.toNum(w);
        //
        //
        //center horizontal in square if needed
        if (centerX == true) {
            x -= w / 2;
        }
        //
        //get the height
        //
        var h = el.style.height;
        //convert to a number
        h = this.toNum(h);
        //
        //center verticaly in square if needed
        //
        if (centerY == true) {
            y -= h / 2;
        }
        //set the positions
        el.style.top = y + "px";
        el.style.left = x + "px";
    }
    //changes 100px to 100
    toNum(s) {
        s = s.replace("px", "");
        s = parseInt(s);
        return s;
    }
    //add a change callback
    addChangeCallback(elName, fun, scope = null) {
        var el = document.getElementById(elName);
        if (scope == null) {
            el.onchange = fun;
        } else {
            el.onchange = fun.bind(scope);
        }
    }
    getTextAreaValue(elName) {
        var el = document.getElementById(elName);
        return el.value;
    }
    getTextValue(elName) {
        var el = document.getElementById(elName);
        return el.innerText;
    }
    hideElement(elName) {
        var el = document.getElementById(elName);
        el.style.display = "none";
    }
    showElement(elName) {
        var el = document.getElementById(elName);
        el.style.display = "block";
    }
}
I hope this has been helpful. If you give it a try, I’d love your feedback.
Form Util class, line 29:
var pos = this.alignGrid.getPosByIndex(index);
should be:
var pos = this.alignGrid.getIndexPos(index);
Thanks very much for pointing that out! I think I must have changed the code at some point.
You’re welcome. That’s what I thought. Thanks for sharing your code by the way.
Hi William,
Thanks for this article. When I was stuck getting the name from the user, this article solved my problem. But it would have been still better, if you had included the ‘Send’ or ‘Submit’ button, to handle the input.
Anyhow, thanks again.
-Raj
Hi Raj,
The button is handled on part 2!
https://phasergames.com/html-buttons-in-phaser-3-form-ui-part-2/
I just started learning how to use Phaser (and javascript, too).
I’m not sure if I understood your code correctly, but using this tutorial, is it possible to insert those text forms to get variables that will be used in the game?
For example, I want the player to decide how many rounds there will be in the game.
Thank you!
You certainly can! I would suggest in that scenario that you would use a dropdown to allow them to select a number.
See this post here:
https://phasergames.com/drop-downs-form-ui-part-3/