Deprecated: Automatic conversion of false to array is deprecated in /home/wcc1969/public_html/phasergames.com/wp-content/plugins/publitio-offloading/includes/class-publitio-offloading.php on line 577
Deprecated: Automatic conversion of false to array is deprecated in /home/wcc1969/public_html/phasergames.com/wp-content/plugins/publitio-offloading/includes/class-publitio-offloading.php on line 577
Deprecated: Automatic conversion of false to array is deprecated in /home/wcc1969/public_html/phasergames.com/wp-content/plugins/publitio-offloading/includes/class-publitio-offloading.php on line 577
Dynamic Text Buttons using Phaser
A lot of my game development time will be eaten up by looking for the right buttons or artwork. It drives me crazy when I want to code. I needed a good library of buttons. It will take up more of my time if I have to copy the buttons and change the text on each one. So it was important to write something where I could pass the button text as a string. Coding is made so much easier by being able to reuse code and assets over and over. That’s why I came up with Dynamic Text Buttons using Phaser
Here are a few examples:

First I’ll show you how to use the buttons, and then we will go over how the button is made.
How to use the TextButton
The button dispatches events via a Phaser.Signal, you can learn about events here.
The format for using the button is
var btnLevel=new TextButton(text,set,style,event,params,font size,text color);
and a practical example is
var btnLevel=new TextButton("Press Me",6,2,G.CHANGE_STATE,"StateLevels",32,'#ffffff');
Let’s have a quick look at the parameters…
Parameters:
-
- Text- the button text
- Set – the folder number containing the image
- Style – image number
- Event- a string
- Params-parameters to pass along with the event
- Font Size-the font size in pixels
- TextColor-a hex color like #ff0000 (red) passed as a string
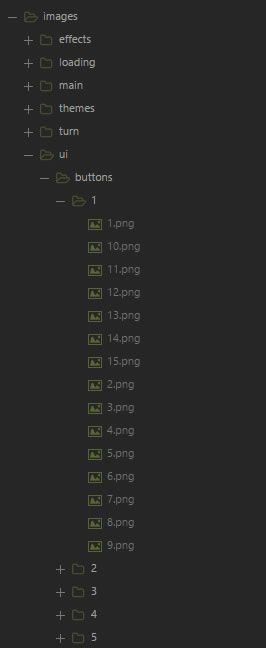
You will find the images for the text buttons in the images folder: images/ui/buttons
I refer to the folders as sets and the numbers of each png image as a style
So set 1 style 2 would be a path of images/ui/buttons/1/2.png
How to make the TextButton
The button is part of the ultimate game parts template, but in case you’d like to see how it is made:
class TextButton extends Phaser.Group {
    constructor(text = 'button', set = 1, style = 1, event = null, params = null, size = 22, textColor = '#000000') {
        super(game);

        //place in center of the screen
        this.x = game.width / 2;
        this.y = game.height / 2;
        var key = "buttons_" + set + "_" + style;

        //promote parameters to class variables
        this.key = key;
        this.text = text;
        this.event = event;
        this.params = params;
        //
        //
        //
        //make the back
        this.buttonBack = this.create(0, 0, this.key);
        //set the anchor to center
        this.buttonBack.anchor.set(0.5, 0.5);
        //
        //
        //
        //add the textfield
        this.textField = game.add.text(0, 0, text);
        //anchor the text in the center
        this.textField.anchor.set(0.5, 0.5);
        //
        //
        //set the size
        this.textField.fontSize = size + "px";
        //set the color
        this.textField.fill = textColor;
        //add the textField
        this.add(this.textField);

        //enable the button and add events
        this.buttonBack.inputEnabled = true;
        this.buttonBack.events.onInputUp.add(this.onReleased, this);
        this.buttonBack.events.onInputDown.add(this.onDown, this);
    }
    //preload a single style
    static preload(set, style) {
        var key = "buttons_" + set + "_" + style;
        var path = "images/ui/buttons/" + set + "/" + style + ".png";
        game.load.image(key, path);
    }
    //preload all the buttons
    static preloadAll() {
        var lenArray = [10, 8, 15, 14];
        for (var i = 1; i < 5; i++) {
            for (var j = 1; j < lenArray[i - 1] + 1; j++) {
                TextButton.preload(i, j);
            }
        }
    }
    //set the x and y position of the button
    setPos(x, y) {
        this.x = x;
        this.y = y;
    }
    //get the back, in order to add events directly to the sprite
    getBack() {
        return this.buttonBack;
    }
    //move up a bit when pressed
    onDown() {
        this.buttonBack.y = -5;
    }
    //dispatch the event
    onReleased() {
        this.buttonBack.y = 0;
        if (this.event) {
            if (this.params) {
                eventDispatcher.dispatch(this.event, this.params);
            } else {
                eventDispatcher.dispatch(this.event);
            }
        }
    }
    //set the text size
    setTextSize(size) {
        this.textField.fontSize = size + "px";
    }
    //set the text position
    setTextPos(xx, yy) {
        this.textField.x = xx;
        this.textField.y = yy;
    }
    //set the text color
    setTextColor(textColor) {
        this.textField.fill = textColor;
    }
    //get the text field
    getTextField() {
        return this.textField;
    }
    //get the text inside the textField
    getText() {
        return this.textField.text;
    }
}
Listen for the button press
So now when I’m building a game and I need a quick button all I need to do is
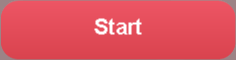
- Create a button
this.btnStart=new TextButton("Start",4,1,"loadState","StateMain",14,'#ffffff');
2. Set up a listener anywhere in the game
eventDispatcher.add(this.gotEvent, this);
3. Set up the listener’s function
gotEvent(call, params) {
   if (call=="loadState")
   {
   	game.state.start(params);
   }
}
Once I get to this point, adding new buttons is a snap!
This has sped up my production time quite a bit, and I hope you find it helpful.